


Idea
Recently I was working on a React project, following some tutorials and trying out new things. But the problem came around when I tried to deploy the application. I was familiar with static website hosting with GitHub Pages and Netlify, which contained only HTML, CSS, and JavaScript. So I began to research the ways to deploy a react app. This blog is the result of my research around this, collectively mentioning the methods and procedures of deploying a react application to the web, for reference for me and anyone who visits here.
PS: This includes the method that I found useful and that I have tried myself. There may be other ways around the problem, that I might have not explored. The below-mentioned methods worked for me very well and if you carefully follow this tutorial-cum-blog, it will surely work fine on your side.
Prerequisite
You must have a react project set up locally. I won't be showing a method to create a react app.
Must have a GitHub Account and Git Installed
As we are talking about react, it is needless to say that you must have node installed with npm working correctly.
Methods to Deploy a React Application
1. Using GitHub Page
GitHub Pages are a famous method to deploy a static app. It is very easy to use and reliable.
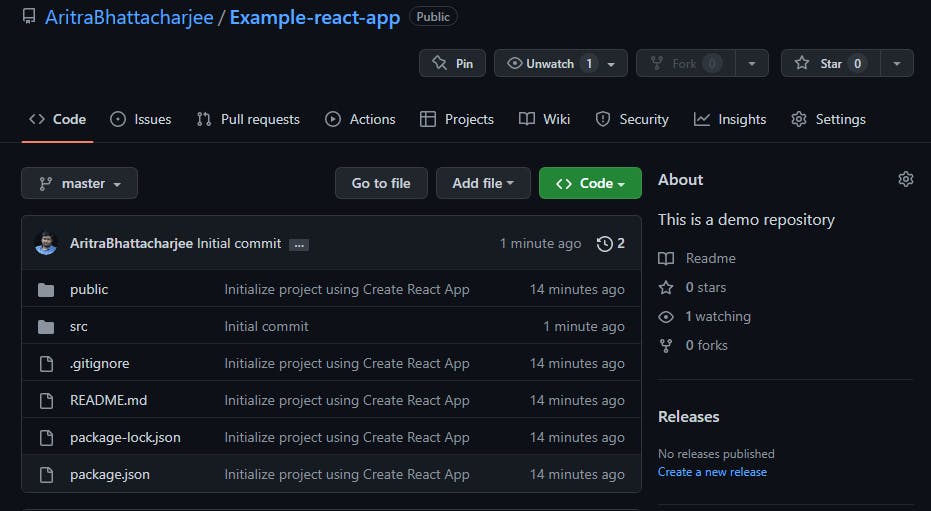
I have an example repository in my GitHub account, where I have pushed the code of an example-react app, shown below.
Install GitHub Pages to your project
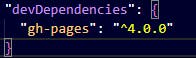
GitHub pages have a node package called gh-pages. This package allows us to publish the build file of our project to GitHub. Run the command to install gh-pages as the dev dependency to your folder.
npm install gh-pages --save-dev
You will see the below code block automatically added to your package.json
Configuring package.json
Now head to your package.json file present in the react app folder. Here, under the scripts property, add the following commands
"predeploy" : "npm run build",
"deploy" : "gh-pages -d build",
Add a homepage property in the package.json, and as a key value to the property, enter a URL in the specified format:
"homepage":"https://{username}.github.io/{repo-name}"
As for me, my homepage URL will be as follows:

Commit the changes and push the code to the repo
Now, we will commit the changes and push the code to our GitHub remote repository
git add .
git commit -m "gh-pages setup"
git push origin master
Generating the build files
We need to generate the build version of our code. We run the following command to do so:
npm run build
As we have already installed gh-pages, running this command does 2 things
Creates a build folder that contains all files and assets that are required to render our static site.
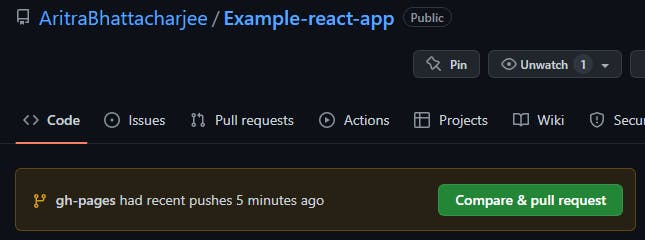
Creates a separate branch named gh-pages and pushed it to the remote repository. This branch contains the files of the build folder. This will enable the GitHub pages to render the files and put them into production.
We are almost there!
Making some changes to the setting in GitHub
Go to the settings tab of your repo and select the Pages subsection under Code and Automation section from the left-side panel.
Under Build and Deployment select Deploy from a branch option in source and Branch to be master and folder to be root. Click on save
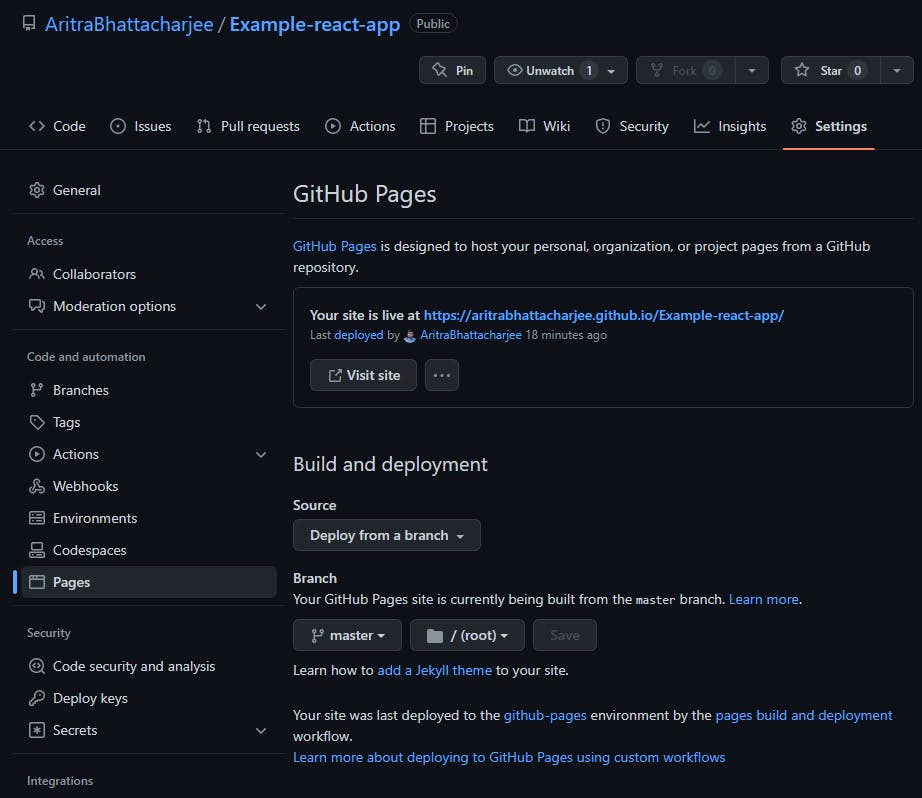
And that's it. You must see that the page is live at the URL that you mentioned in the homepage key.
Additional Point
In this process, you might encounter that your deployed app is rendering either only your README.md file or both your app and the README.md file. This might occur due to the deploy command that we used earlier in the package.json.
Consider changing it to the code below
"deploy": "gh-pages -b master -d build"
Note that my branch in this case is master, but in some versions of git, it might be named main. Replace master with main if your branch name is main.
2. Using Netlify
It is another popular service for developers to host sites for free. Head over to Netlify and make a free account.
Sign In to Netlify
After verifying your account and signing in, you will see a dashboard.
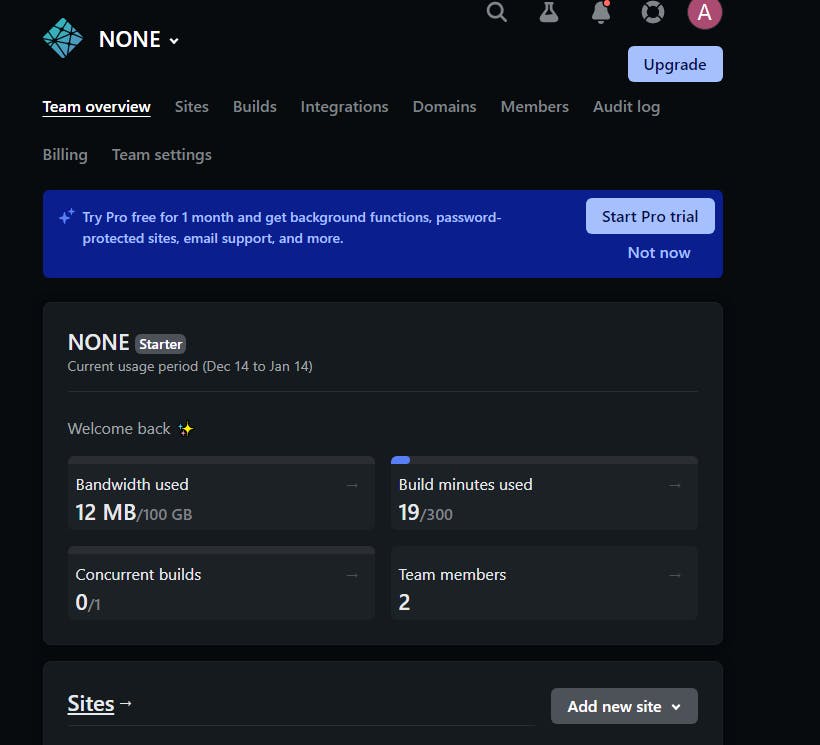
Click on Add new site.

From the three available options, you can use any option for deployment. But avoid deploying manually because
It involves manually uploading the build folder here.
The major disadvantage is this does not provide a CI/CD pipeline, which does not enable us to automatically put it in production when we make any change in the code.
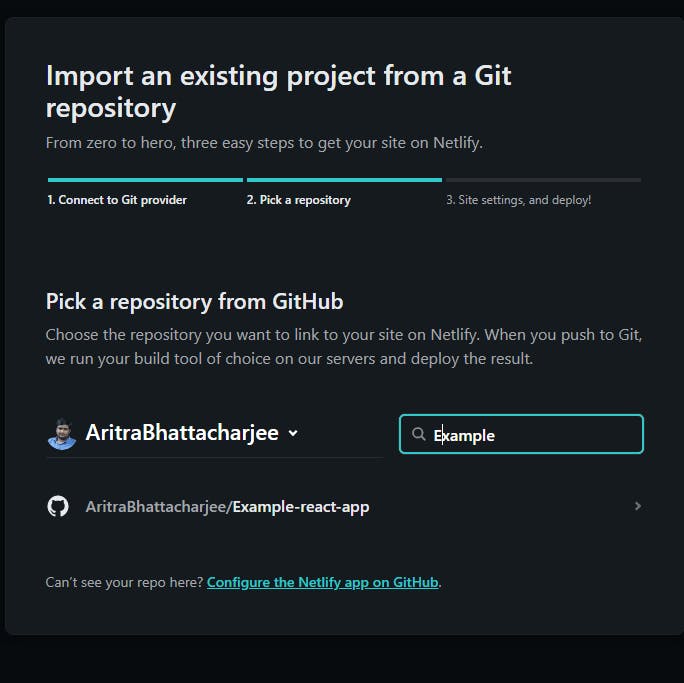
Select Import an existing project. You will see a page like the following -

Connecting to GitHub and Selecting a repository
As we already have a repository in GitHub, we will select the same option. Then you will be redirected to a new window, where you need to authorize Netlify to access your GitHub repositories. Then you will be shown all the repositories in Netlify, and you need to select the repository which you want to host.
Site Settings
This is the most important part when it comes to reacting to app deployment. Leave the Owner and master branch untouched. In the Basic build settings option,
Leave the Base directory blank
In the Build command, write
npm run build, which is the command that is used to get the deployable version of your app.In the Publish Directory, write
build.By this we specify, that we want to deploy from the build folder that will be generated by running the build command
Click on publish and now you are done! Netlify will run the deploy command and then your site will be live.
Conclusion
These are the two methods that worked for me. As I have already mentioned, I have not tried other possible ways around it, but what I can ensure is that these methods can get your website running in no time. Also, these methods are based on CI/CD (Continuous Integration/Continuous Delivery), which enables you to automatically trigger deploys when any change is brought to the code in the repository, that is, whenever we commit new code to the repo.
If this tutorial helped you, please consider liking the blog, commenting, and following me.
Thank you for reading!